
Project Planning with Microsoft Planner
In this blog I’ll walk you through setting up your Microsoft Planner for your team or business. It’s not too difficult, but like anything with customization it is not always intuitive out of the gate.
Steps:
Planner & Teams
The first step I will touch on is using Planner in combination with Teams. If you aren’t using Teams feel free to skip to the end of this section.
When setting up a planner for one of your teams within Microsoft Teams, select the team that you’re making a planner for, then click the plus icon.

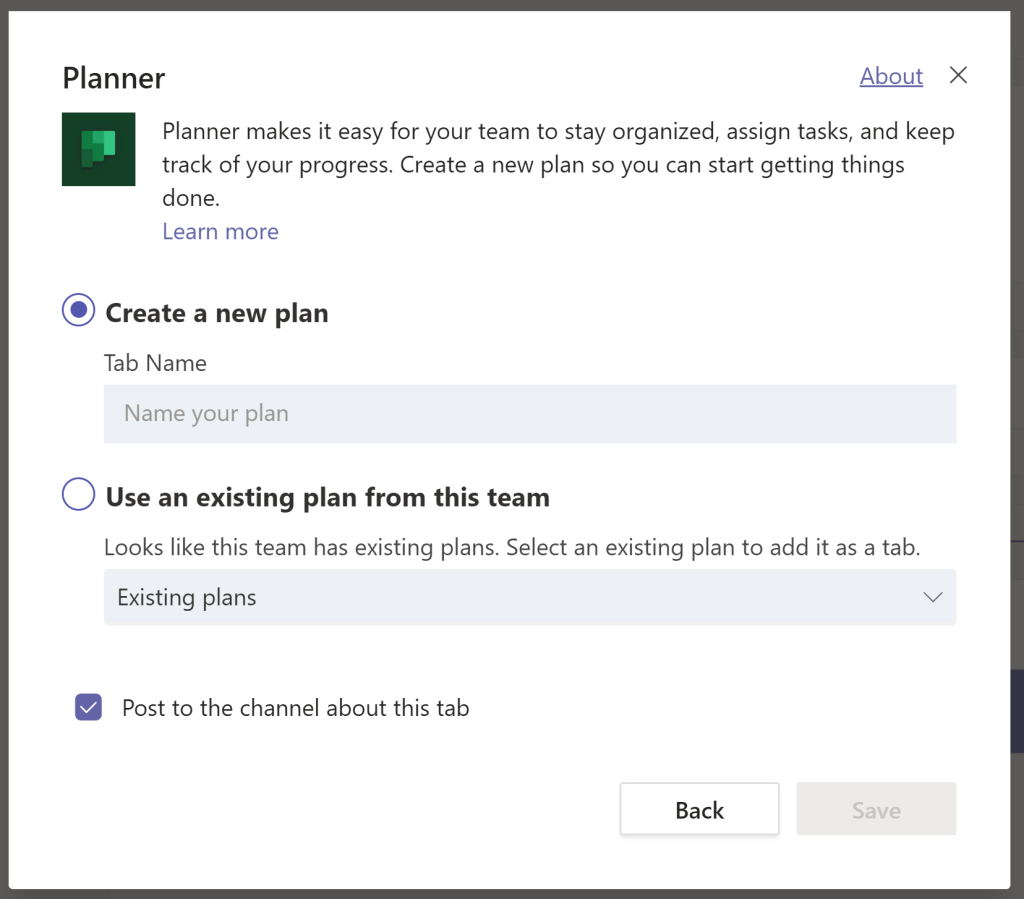
Next select “Planner” from the new tab options

From there all you need to do is name your plan!
If you aren’t using Teams, goto https://tasks.office.com and + New Plan .
2. Buckets
Now that you have a plan set up in Planner you need to set up “Buckets”. Planner uses a project management system called a Kanban board. Trello and Asana both also use this style of task management. Your buckets are just your task sections, groups, or columns. For example, on our Content Pipeline planner our buckets are: Ideas, To be Produced, In Progress, Completed, and Posted/Shared.

Planner uses “Cards” to organize tasks. So each task is a card that can be dragged and dropped easily into any bucket
So in our business when someone is going to write a blog they start by finding an idea. They can look in the ideas bucket and see different blog ideas that the team has added. They can then move it across to the To Be Produced bucket and assign it to themselves until they start working on it. Once they begin they move the card to the In Progress bucket. They keep moving their blog idea card until it’s been posted and shared on our social media, then they can mark it completed.
Your buckets will completely depend on what your planner is for, but before you can go further you need to have your buckets created. So write down what each of your buckets will be and start creating.
Creating the buckets is much easier than coming up with them. All you do is click “Add new bucket” and give it a name.

3. Tasks
Creating tasks is super easy in planner. Just click the “Add task” button. From there give it a name, a due date, and assign it to a team member.

After you created the task you can open it in a larger view to add more in-depth details. Simply click on the task you’ve just created.

In this larger view, you can set the progress, priority, start date, add notes, add subtasks / a checklist, add attachments like photos or videos, and you can add comments to the task. This more in-depth view is great for tasks that require collaboration between team members.
Labels
The last step in planner organization is definitely an optional one. Labels can be a creative visual way to see what kind of a task it is. For example, on our Content Pipeline planner you can see we have labels for blogs and videos. That way at a glance I can see which ideas are specifically blog or video ideas.

Your labels can be anything and you can have up to 6.

When you open the bigger section of a task on the right side you can see your labels. To rename them just click on the text and name it whatever you’d like.
One last note. Any task assigned to a team member, automatically goes into their Microsoft Todo, under the “Assigned to You” category. The online version of Todo is https://to-do.office.com/ .
Hopefully, this blog was helpful and you can get you planners up and running! If you have any questions comment below or reach out to me!